
Snacking and Crafting with a Girl’s night in – DIY Caddy
This shop has been compensated by Collective Bias, Inc. and its advertiser. All opinions are mine alone. #OREOTHINSideStory #CollectiveBias
Every Wednesday night is my night! My family knows that come 7:00 p.m. my best friend will be showing up and it’s time to leave mom alone. We usually have a list of crafts we would like to work on and have purchased items for our project that night. I am the treat queen and usually have found some yummy snacks for us to snack on while we craft and chat.
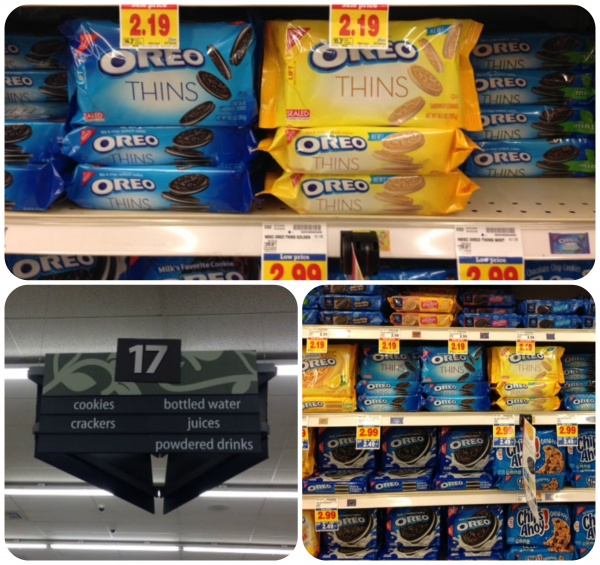
Earlier in the week I had ran some errands and stopped by my local Smith’s Food and Drug store. While looking down the cookie isle I noticed the OREO Thins (Did I mention that I am a huge OREO fan)? I love all of the other varieties of OREO’S and decided to give the OREO Thins a try. I picked out a variety of Original and OREO Thins Mint. I love that my Smith’s Food and Drug (A Kroger store) carries a huge variety of grocery and household items, It makes my trip quick and convenient for a one stop shop. I added the OREO Thins to my cart and was able to finish up all my shopping errands at my Smith’s Food and Drug store quickly.
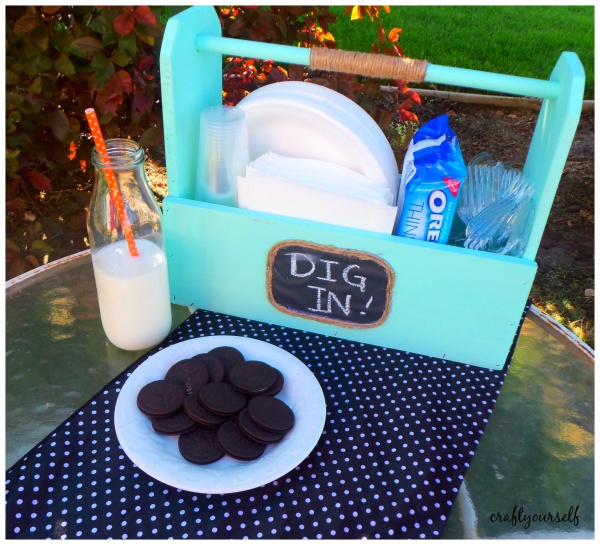
For this week’s craft night we decided to make a multi functional wood caddy. Our inspiration came from Cleanandscentsible.com although she recycled an old planter box we figured we could build our own. I had a tool box that my son had made for scouts that I adjusted the measurements from. So while I was out shopping I also picked up some crafting supplies so we would be ready to craft on Wednesday night. Make your own multi-purpose caddy by following our step by step instructions
You will need the following supplies:
-2 slats of Redwood fencing (5 & 1/2″” wide)
-1 1″ dowel
-paint (of your choice)
-jute
-chalkboard vinyl
-3 mason jars
-hot glue
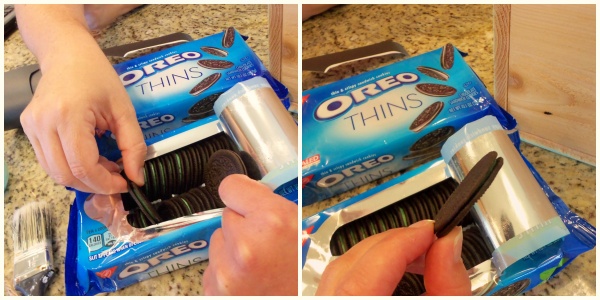
-OREO Thins (for snacking)
Power tools needed:
-chop saw
-Jig saw
-power sander
-drill
-brad nailer

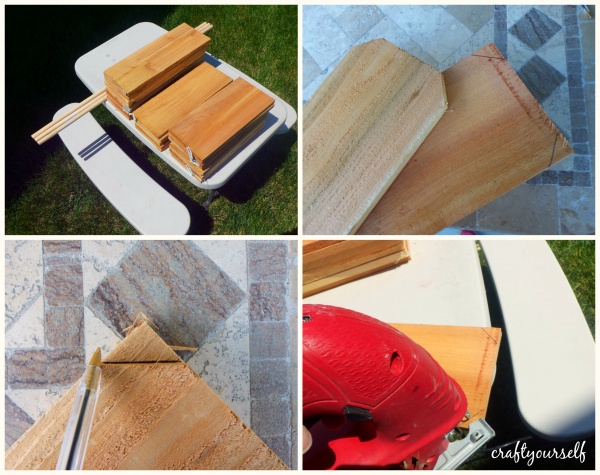
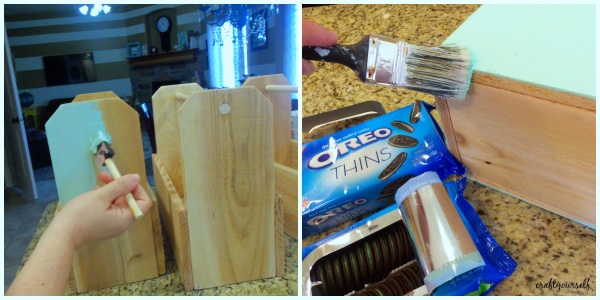
We began our project by using the chop saw and cutting our redwood fence slats and dowel.
you will need:
2 pieces of Redwood cut to 15″ in length
2 pieces of Redwood cut to 12″ in length
1 piece of Redwood cut to 14″ in length
1 – 1″ dowel cut 15″ long
After you cut all of the fence slats to the desired sizes, take the 12″ Redwood cut boards and use the top to mark a corner off of each side. Use a jig saw to cut each corner off of the fence slats. This gives these boards a dog eared look.
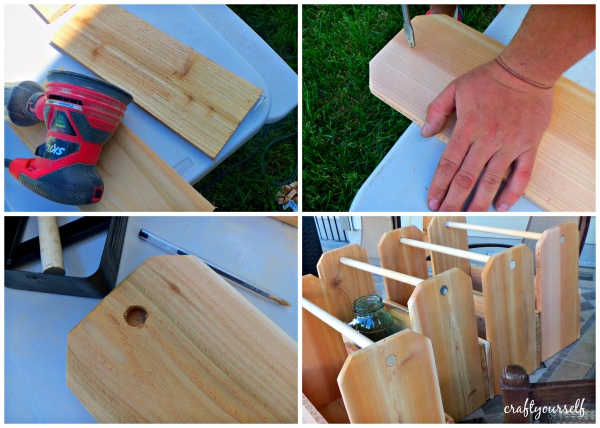
Next sand all of the wood to give it a smooth finish. Then take the 12″ dog eared boards and drill a 1″ hole in the center about 1″ down from the top of the board. We got a little into the project at this point in time and forgot to take pictures of the assembly! To assemble your caddy you will place the 14″ board on the bottom, line up the 15″ boards on each side of the 14″ board.
You will have 1/2″ hanging over each end. Brad nail the 15″ board standing up onto the 14″ board. Then place the 12″ dog eared boards on each end. Brad nail the 12″ boards to the 14″ and 15″ boards. Lastly slide the wooden dowel down through the drilled holes and brad nail it in place through the top of the 12″ board.
Once assembled is when the fun begins! Grab your seats & treats girls and begin painting the caddy in your favorite color! During painting time it’s a great opportunity to chat, snack on the OREO Thins and enjoy some mom time! Allow some time for your paint to dry (Our caddy’s took a couple of coats to get full coverage).
After the caddy is dry it only takes about 10 minutes to finish up the project. Next pull out your jute! At this point we just eye balled where we wanted to start wrapping and where we wanted to stop. Start by hot gluing the jute at the loose end then wrap it around the dowel. Add a few drops of hot glue as you wrap to make sure the jute stays on the dowel. Try to keep the jute in the middle of the dowel and finish it off with a dab of hot glue.

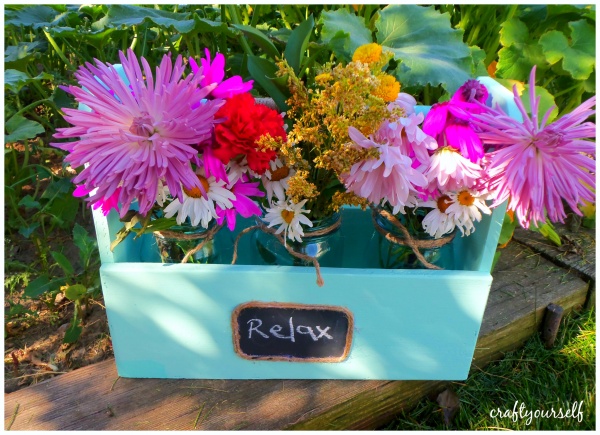
Cut the chalk board vinyl to the desired size that you want to put on the front of the caddy. I love the chalk board vinyl because it has a sticky adhesive on the back so you can stick it on anything that you would like. Take some jute and glue it on around the chalk board vinyl.

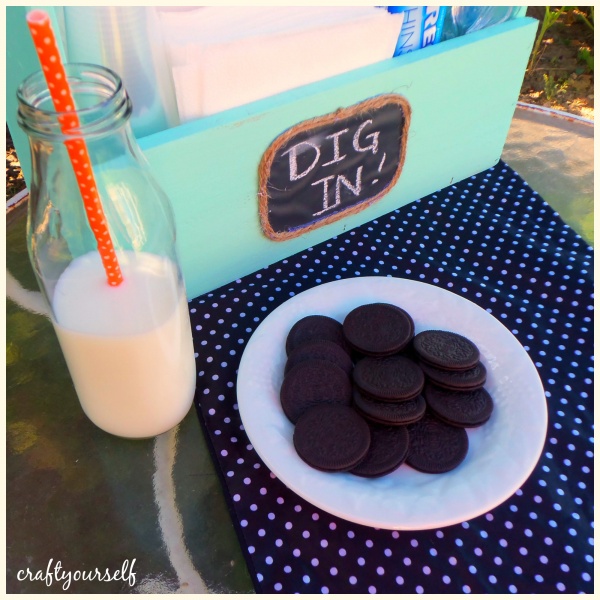
Here are a few ideas that we came up with for our multi-purpose caddies.
1- Flower box (add mason jars to put the flowers in)
2- Picnic caddy (to hold all your picnic supplies)
3- Girls craft box
4- Spa box next to the tub
5- Magazine holder
The sky is the limit as to what you could put in your caddy! We love our girls crafting night because we get to spend time with one another, have treat time and go home with something we made for our homes!
Have you tried the new OREO.com Thins?What is your favorite flavor? Check out OREO Thins on Social media and don’t forget to enter their sweepstakes for your chance to win!!
OREO Thins at Kroger (July 2016)

One Comment
Joanne banta
It would be great to win