Crafts
-
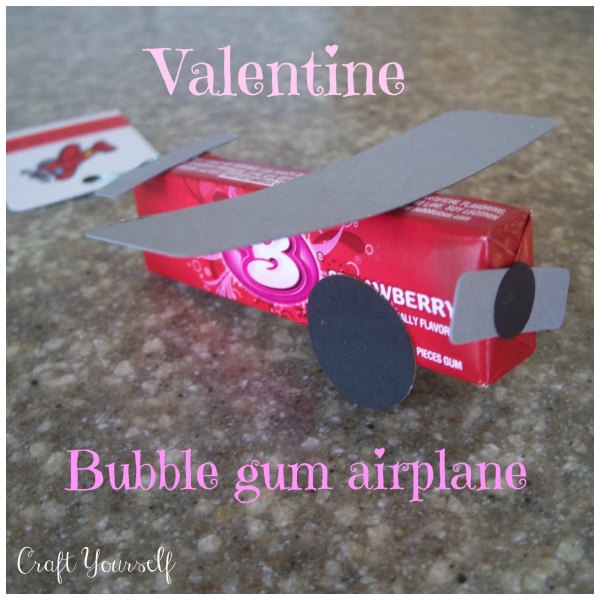
Valentine bubble gum airplane
Valentine bubble gum airplane Here is fun valentine and even the kids can help. I purchased the bubble gum in 3 packs from the dollar store. I used my silhouette machine to cut out the 3 different sizes of rectangles and circles for the wheels and propeller. You can also use a paper cutter, punches or a good old fashioned ruler and scissors to cut the rectangles out. Next we hot glued all the rectangles and circles on. We created the tag using a stamp from the stampin up set “toy box”. I had my son color in the stamp, while I typed and printed the “love is in the…
-
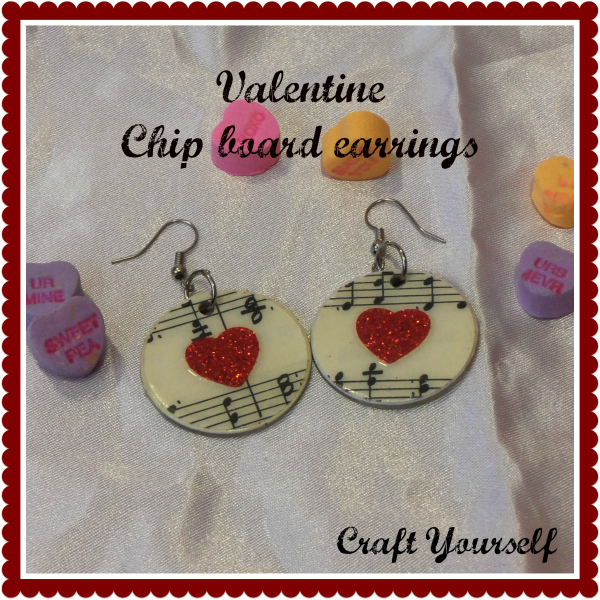
Valentine chip board earrings
Valentine chip board earrings This is a fun little valentines project. It is easy enough that Tweens or teens could help or make on there own. You will need chip board circles. Mine are from a pre-printed pack of chip board designs. The circles I used measure about 1 1/2 inches. I also used some old printed music and red glitter card stock. You will also need a circle punch or cutting machine to match the size of your chip board circle, a heart punch or pre-cut hearts, glossy affects or crystal accents glaze, earring hooks and jump rings, a small hole punch, and tacky glue. I know that sounds…
-
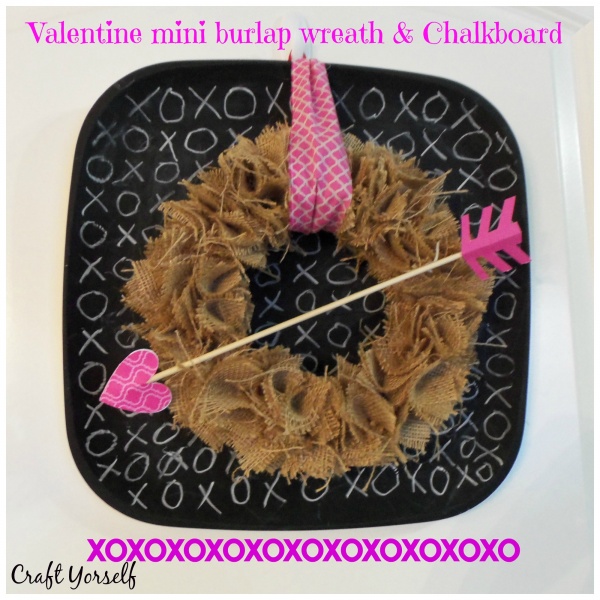
Valentine Mini burlap wreath and chalkboard
Valentine Mini burlap wreath and chalkboard My inspiration came from Tied Ribbon Mine is a mini burlap wreath. She made a full size wreath and used book pages. I honestly just used junk!!! I had lying around my house. I had this platter, that I wasn’t using anymore. I sprayed it with chalkboard paint and that became my frame for the background. The white ring was an outer cap that came off of some lights we replaced in our home and I used the light ring for the base of my wreath. I cut scrap burlap into 2″ squares, then folded them into fourths and glued them onto the ring.…
-
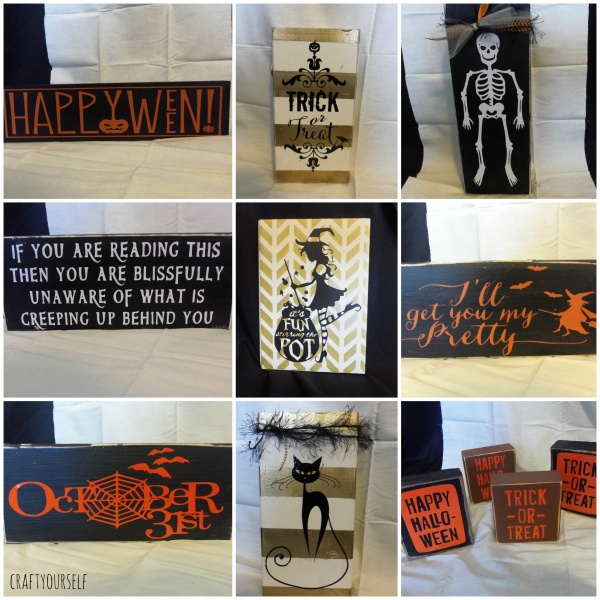
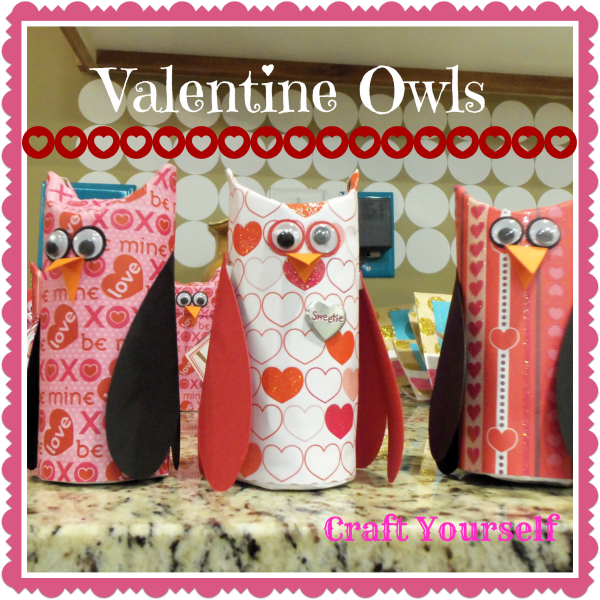
Valentine Owl favors
Valentine Owl favors I made these darling valentine owl favors. I found them at Happy Clippings she has a pretty detailed amazing tutorial on how to put these together. I changed a few things on mine. I glued a piece of paper in the bottom of my owl. Then I filled them with valentine candies. I also choose not to put a ribbon to hang them from. I would check out her tutorial. This is even easy enough to get your kids involved. Start saving your toilet paper rolls!
-
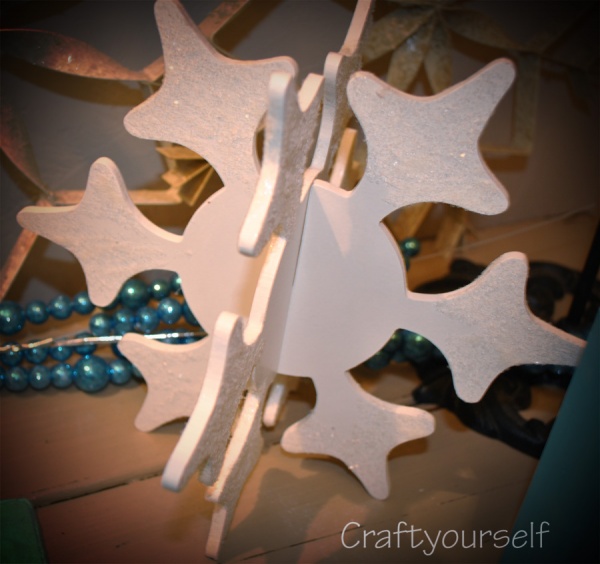
3-D Wood Snowflakes
3-D Wood Snowflakes Coming up with creative snowflake and snowman ideas can be difficult but I thought it would be fun to re create a 3-D version of a snowflake. These snowflakes are cut from 1/4″ pine (very thin) and the template I created isn’t the best because it is hand drawn. But it worked. I cut these on the scroll saw then painted white and glittered the edges in an iridescent white glitter. I have these spread all over my entry table and sofa table. You could also drill a hole in them and have them hang on fish wire from the ceiling. They would be cute hanging…
-
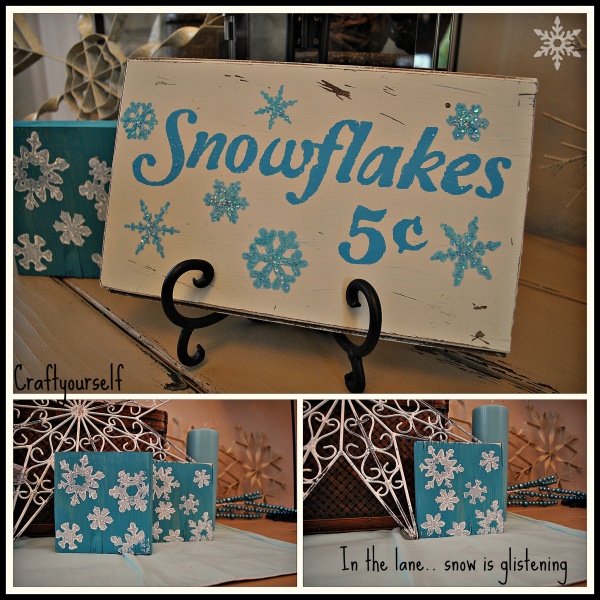
Snowflakes 5 cents sign and snowflake blocks
Snowflakes 5 cents sign and Snowflake Blocks Two Snowflake projects to finish off our Snowflake and Snowman Series! Both projects were very fast and easy! The snowflake blocks were done on left over scraps of wood from other projects – painted them a light blue/turquoise color, scuffed up the edges then used some old sponge snowflake stamps that my mother had given me to stamp on the snowflakes. While the paint was still wet I added some glitter onto each snowflake. The snowflake 5 cent sign was done on some of the hardwood flooring Krystal had left over. Painted this a cream color and scuffed up the surface before applying…
-
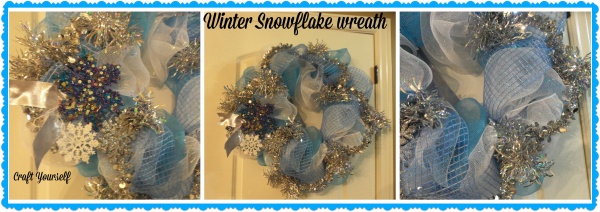
Winter Snowflake Mesh Wreath
Winter Snowflake Mesh Wreath Now that I have taken down all my Christmas Décor. My front door was looking so sad. I decided to make a deco mesh wreath for my door. These wreath’s are really easy and come together in 30 minutes or less. Back in November I made a fall Deco mesh wreath. You can check that one out here you will find a link on this post with really great instructions to make your own deco mesh wreath. For this wreath I went along with the snowflake theme for winter, and to match my giant marquee snowflake Avry made me. I hit up the stores today and…
-
Snowflake picture stand “Frosty’s Baby Picture”
Snowflake picture stand “Frosty’s Baby Picture” I love the idea of Frosty’s baby picture. I saw this idea on Pinterest yet the one I saw was a block of wood with a simple snowflake painted on and a caption below the snowflake that said Frosty’s baby picture. For this project I chose to make a layered picture frame stand. To make this I used a candle stick, a thick 4×6 frame and a decorative craft frame found at Michael’s. I painted my regular frame and candle stick white the decorative craft frame blue and added glitter. Next, I glued the decorative craft frame on top of the regular frame, and…
-
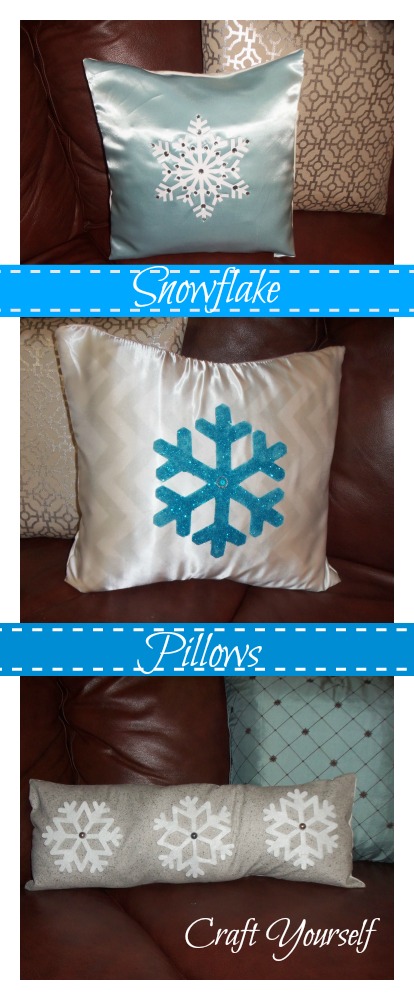
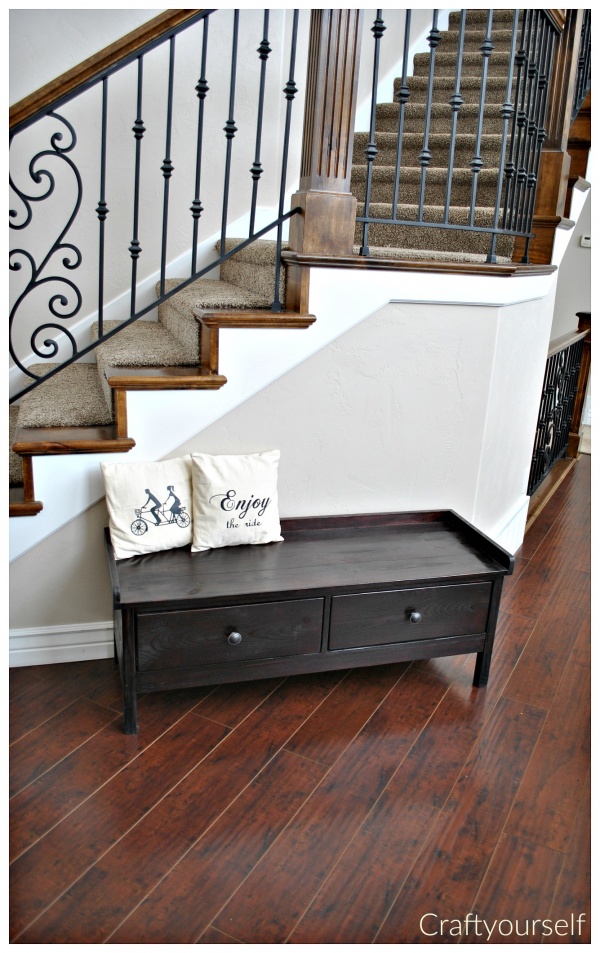
Snowflake pillows
Snowflake Pillows Avry and I decided to make some fancy snowflake pillows as a girl can never have too many pillows! Plus like I said before, pillows can change the feel of a room. We used the same envelope style to make all these pillows. For the first pillow, we chose a white satin fabric, then I pinned and sewed my envelope pocket on the back of the pillow. Next I used my silhouette machine to cut some blue felt into a snowflake design. Did you know your silhouette can cut fabric too? This was my first time using my machine to cut fabric. I will do it again! So…
-
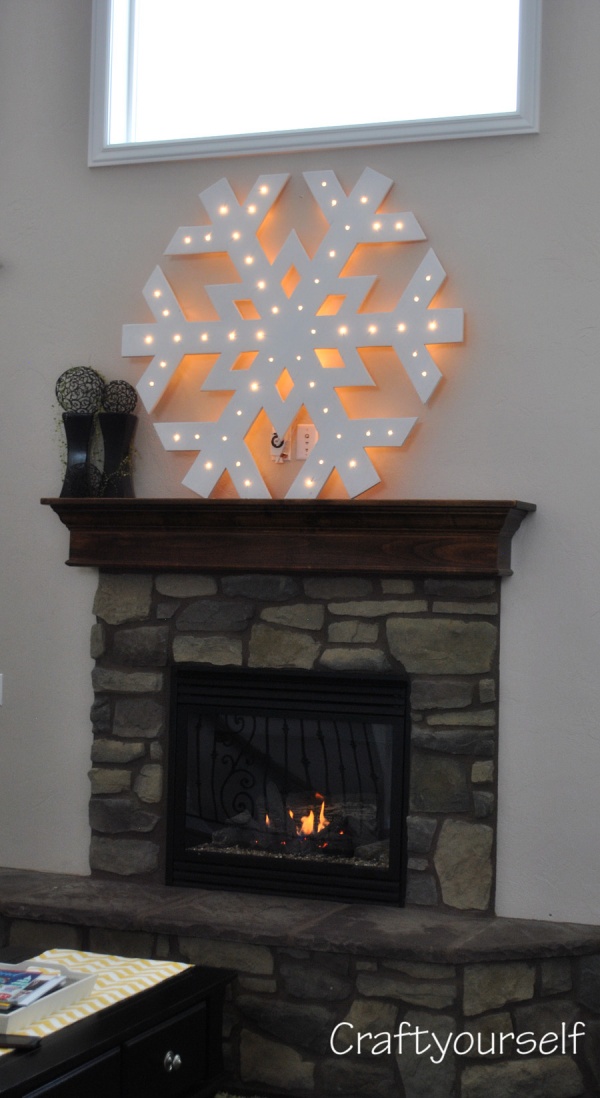
Large Snowflake Marquee
Large Snowflake Lighted Marquee Yep! I am going to say I am NOT ready for the holidays to be over. Taking down 2 of my trees made me sad as I always get a little down after the hype of the holidays is over. So, this year I wasn’t going to let my house look so drab after the Christmas decor’ was done. So, I decided to do a theme in my home for the month of January of snowmen and snowflakes! Join me this week as Krystal and I share a few fun whimsical winter ideas with you! First snowflake share of the series is this Large Snowflake that…