
Stand up gift bags “gift ideas for all occasions” free printables
Stand up gift bags “gift ideas for all occasions” free printables
I love simple but over the top looking gift bags. It’s great to throw a treat or small gift in a clear bag and tie it up. I was recently introduced to these pre-designed stand up gift bags. While they are fine looking on there own, I felt they needed a little sprucing up. I have come up with 7 different ways to take these bags from good to great. These projects should help with the up coming holidays and really any occasion from a birthday to a thank you gift. I have also included free printable’s to coordinate with each idea. If you are looking to purchase these stand up gift bags they will be available this week at Roots tech conference at the Family History Expo Booth they are offering an amazing deal 5 for $1 or .25 each ( normal price is 5 for $5.99) take advantage if you are in the area or are already attending the conference. The conference is being held at Salt Palace Convention Center , 100 South West Temple, Salt Lake City, Utah. The Roots tech hall is free and open to the public. Pop on over and grab some of these fun bags.
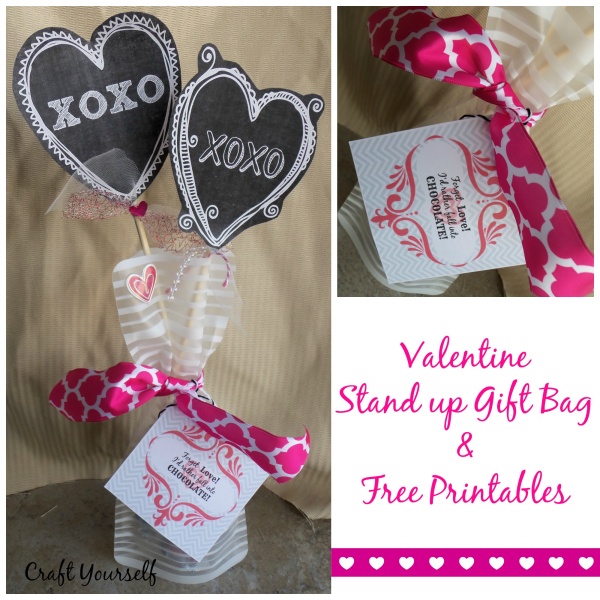
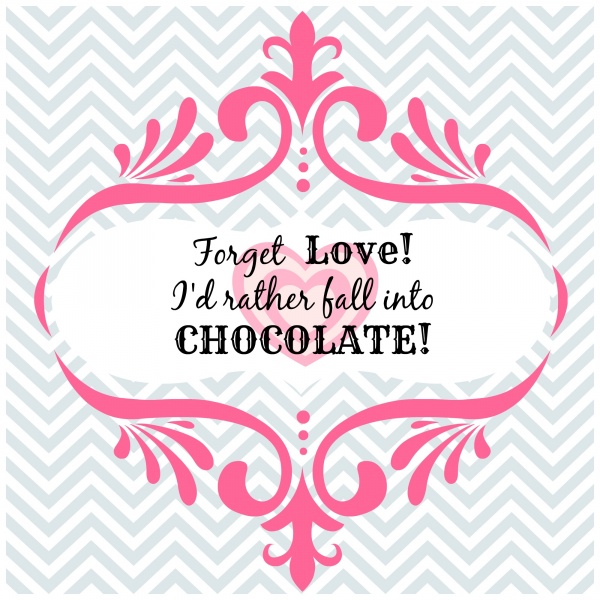
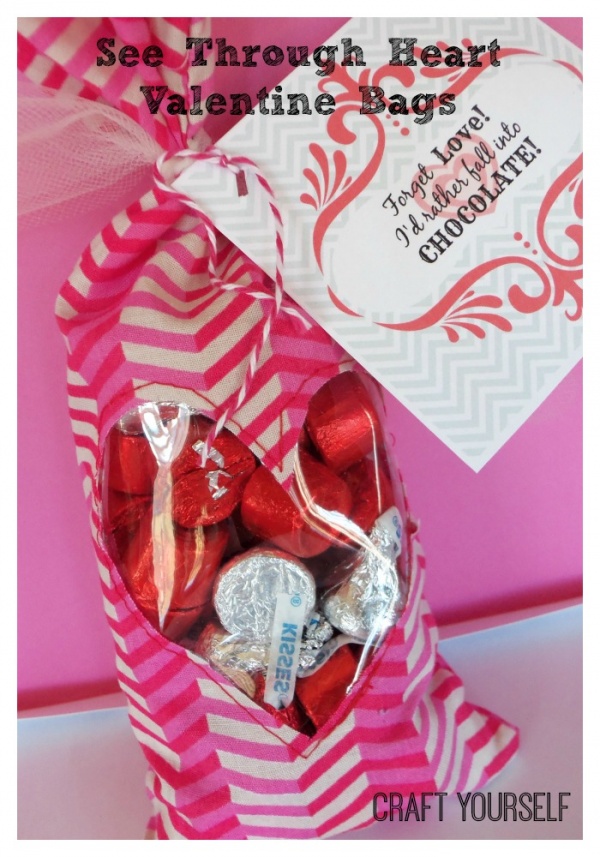
My first idea is to go along with Valentine’s Day coming up this week and this took me only 5 minutes to put together. I used the tall white striped bag, placed a few fun size chocolates inside, then made 2 printable’s to go along with them. Print off the chalkboard hearts and the forget love tags you can do this by clicking on the image then copy and paste the images into the program of your choice. I cut around the chalkboard hearts and then taped them onto some wooden skewers. I tied some tulle and string onto the skewers at the bottom of the heart. Next I stuck the 2 skewers into the bag at different heights then tied a larger ribbon around the middle of the bag. Using some bakers twine I tied the forget love tag around the middle to finish it off. I know it seems like a lot of steps but I promise it really only took 5 minutes to put this together!

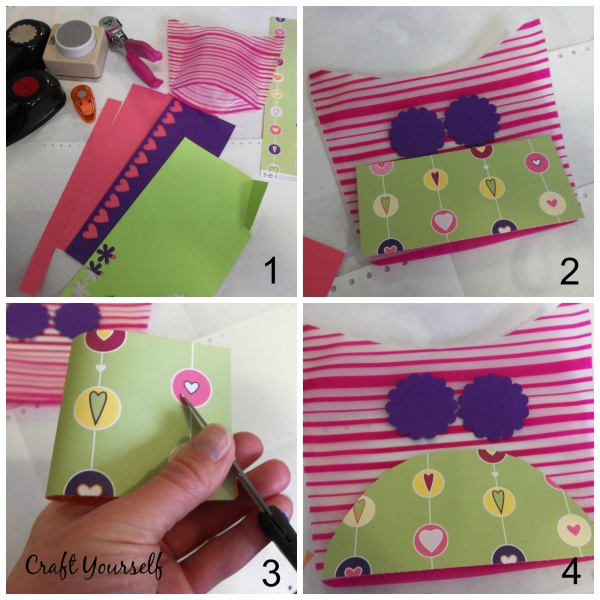
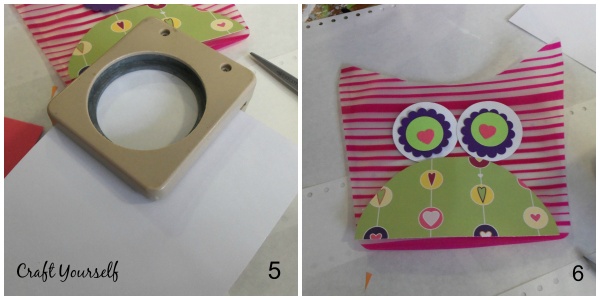
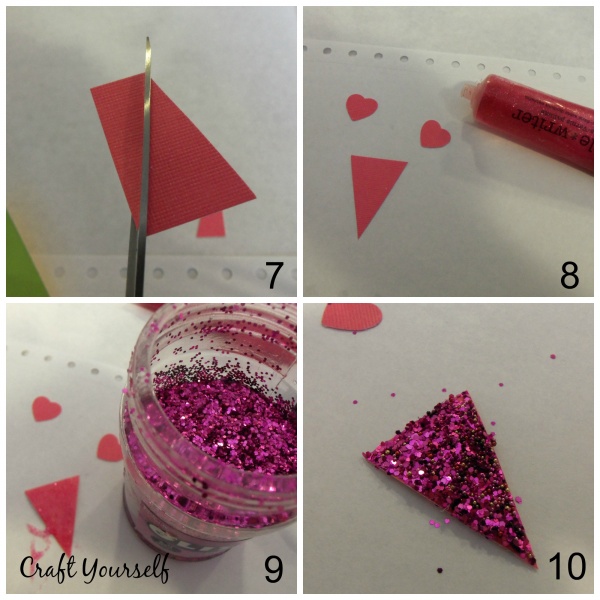
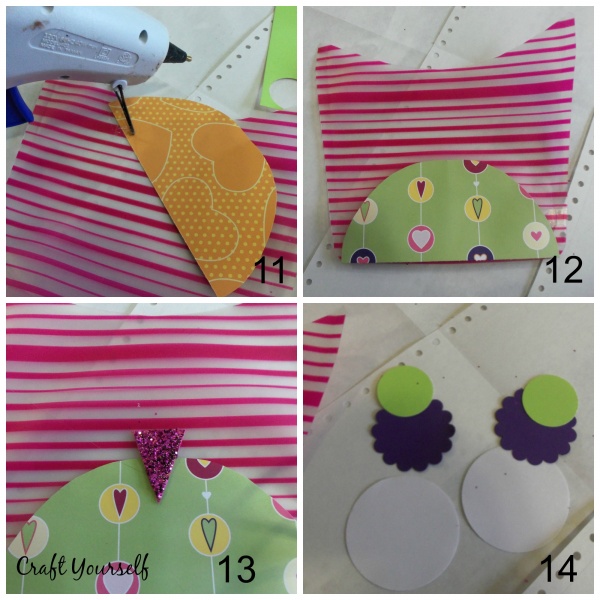
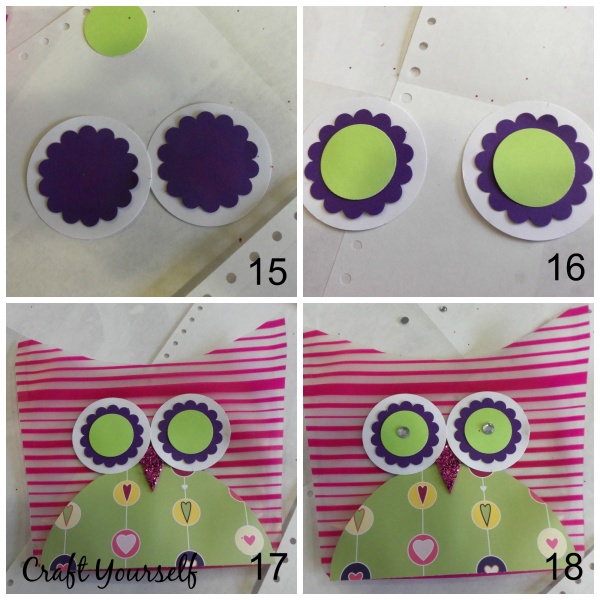
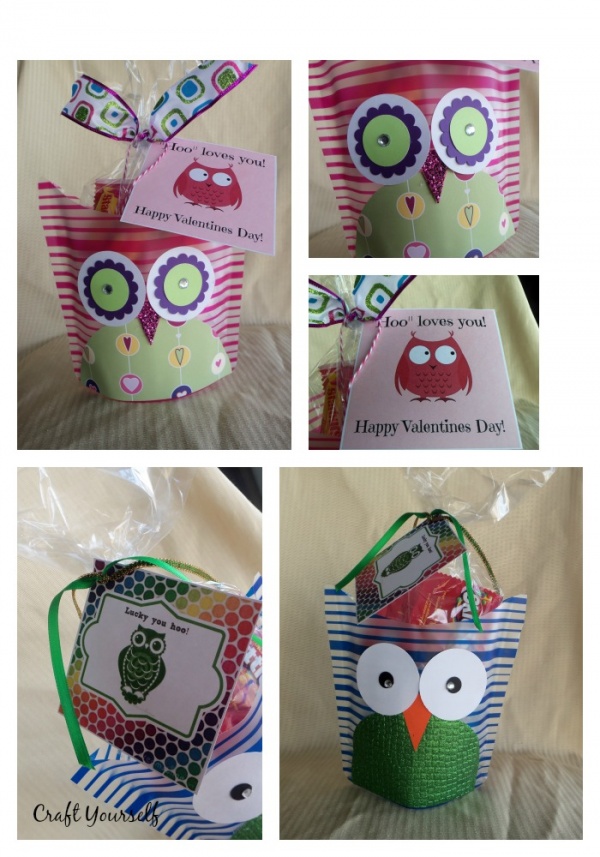
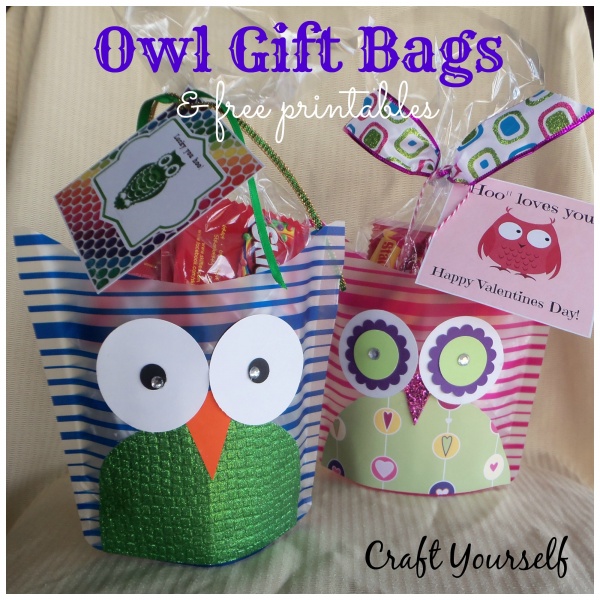
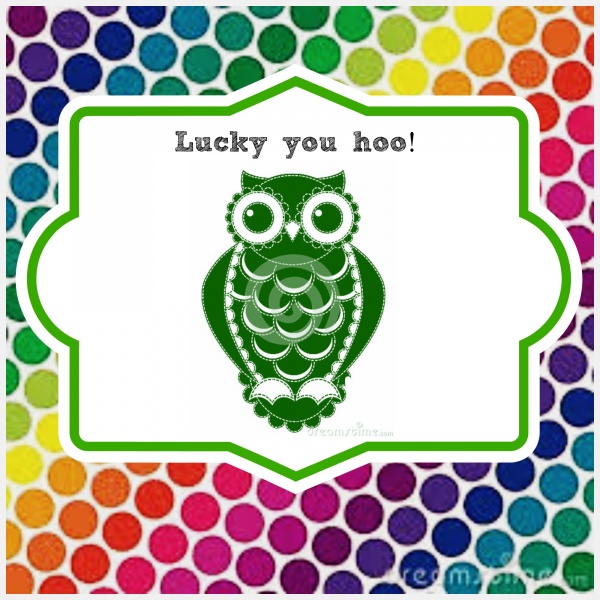
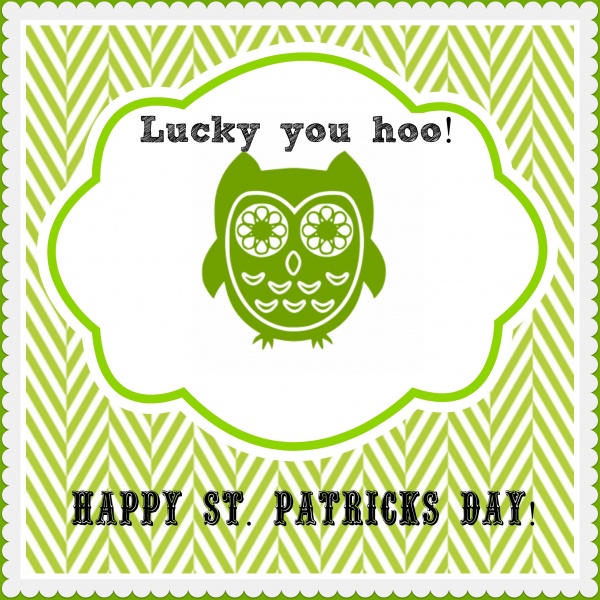
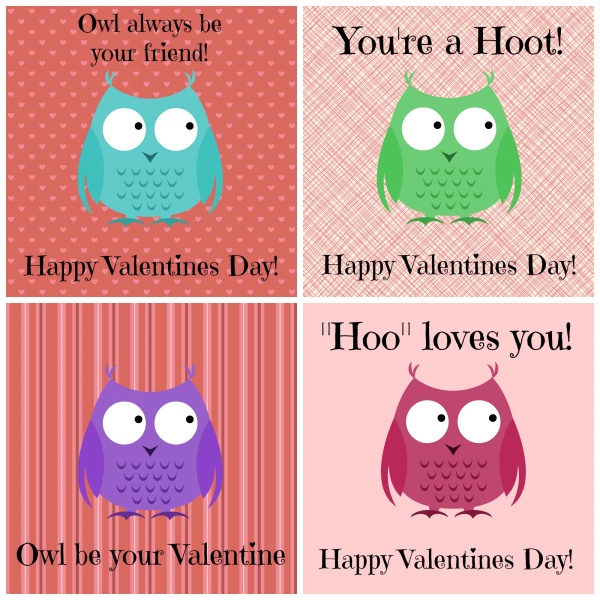
My second idea for the stand up bags you can be used for Valentines day or St. Patrick’s Day. I have an obsession with cute owls so when I looked at this bag I could see an owl in the shape. I folded the bag in half and trimmed out a half moon shape from the top of the bag to form ears for the owl. Next I used a variety of punches and scrap pieces of card stock and scrap booking paper that I had. I cut a rectangle measuring 2 1/2″ in by 6″ then folded it in half and trimmed the edges to make a half circle which will be used for the belly of your owl. Then I punched out 2 white 2″ circles for the background layer of the eyes. I also punched out 2 scalloped circles and 1 1/4″ circles that in layered on top of each other to make the eyes so there would be 3 layers total. I cut out a triangle that I glittered to use for the beak. Using the hot glue gun, first glue the belly on the bag, next glue the beak centered and overlapping the belly, then glue the eyes on. I also added a jewel for the pupil in the center of the eyes. Pop open your stand up bag and fill with desired treats and attach with free valentine prints or St. Patrick’s day prints.
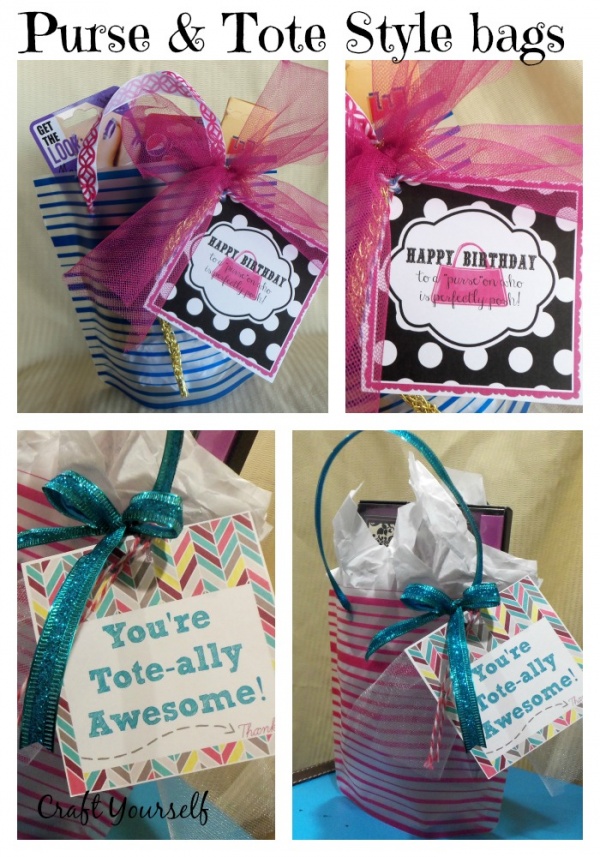
My third idea is a purse or tote bag which would be darling for a girl. When I saw the shape of this bag that is what came to my mind first. I made up a birthday printable and a thank you printable to go along with these bags. I simply used a hole punch and punched 2 holes about an inch down from the top and 2″ from each side. I cut 2 lengths of ribbon about 6″ each, then threaded the ends into the holes on one side and taped the ribbon down on the inside of the bag to secure them. Now the fun part fill with a small gift or treats and tie some fun ribbons and one of the tags onto one of the handles.


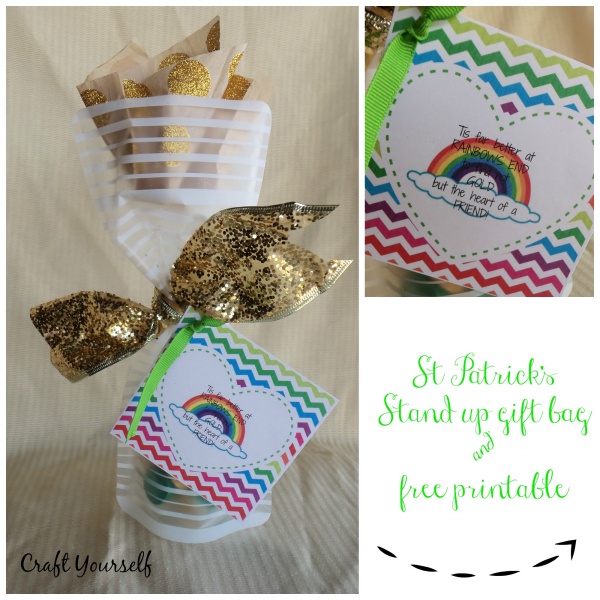
My fourth idea is similar to the first one. I used the tall white striped bag and filled it with Rolos. Then I printed off the St.Patrick’s day tag, tied a large gold glitter ribbon around the center and attached the tag with a small green ribbon. To top it off, I cut a small square of gold tissue paper and placed it in the top of the bag.
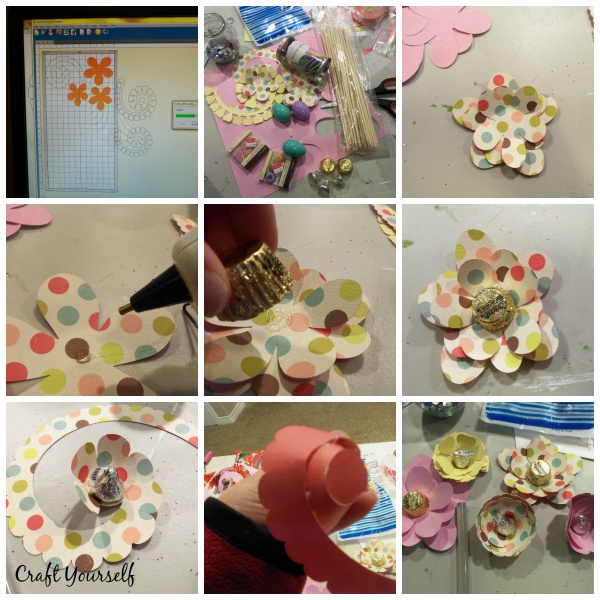
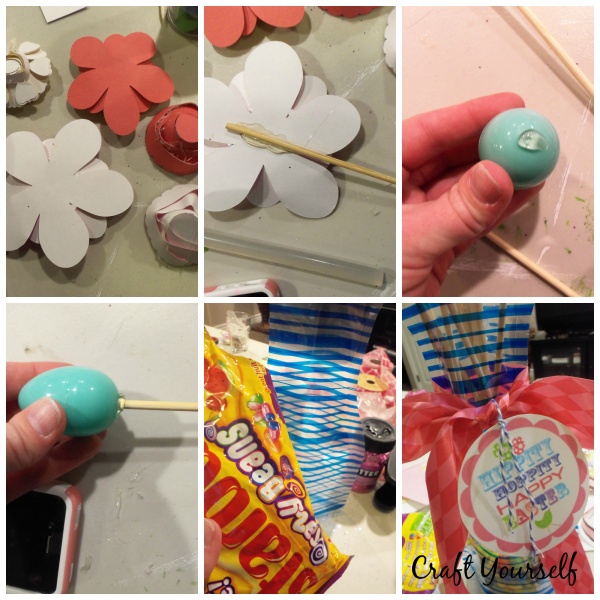
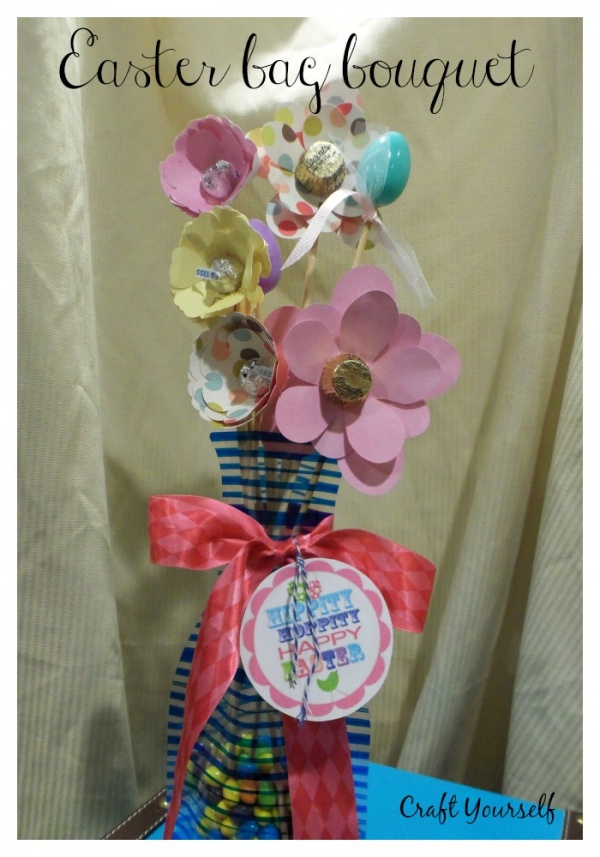
My fifth idea is for Easter or Spring. First I opened the bag to the standing position then I filled the bottom of the bag with jelly beans. Next, I downloaded the free files for the rolled flowers from Birdscards then I cut the flowers using my silhouette machine. However, if you don’t have a personal cutting machine these flowers would be easy enough to cut by hand. I glued Hershey Kisses onto the center of the rolled flower strip and then rolled the flower around the chocolate candy. I also cut flat flowers and glued 3 layers together and then glued a mini peanut butter cup in the center. After I assembled all the flowers I glued wooden skewers on the back of the flowers. I also had some mini plastic eggs that I used to glue onto a wooden skewer. Along the bottom of the eggs I tied some ribbon to cover the glue and to give it a little embellishment. I arranged the flower and egg sticks inside the bag then tied a large bow around the center of the bag. I attached a Easter printable tag that I found here at Family Fresh Cooking.
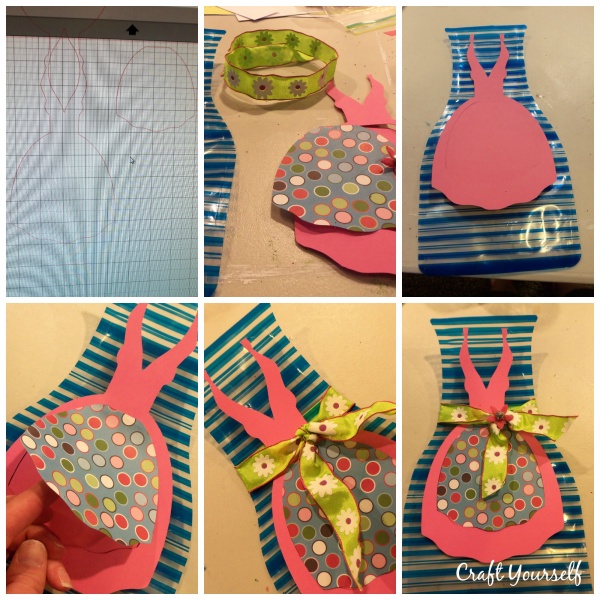
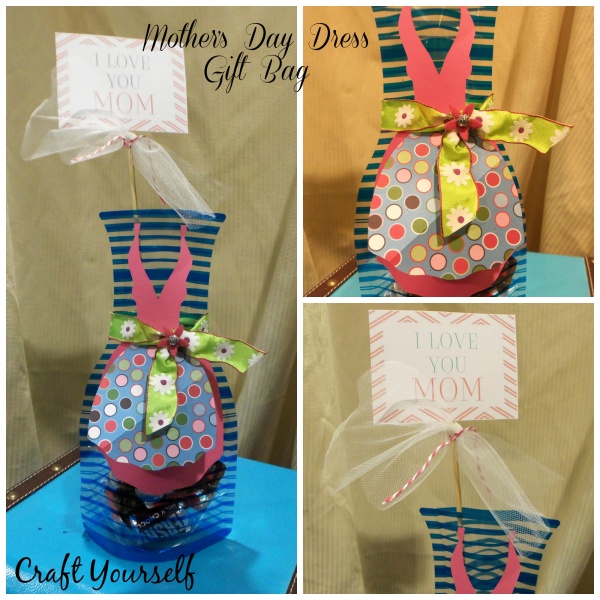
My sixth idea is for Mother’s Day. I filled the bag with chocolate candies. I found the dress and apron file on the silhouette.com site and I purchased it for .99 cents. I adjusted the size to fit my bag. I cut the dress on pink card stock and cut an overlay apron in blue polka dot paper. If you don’t have a personal cutting machine you can use this template to hand cut another style of apron. I glued the top strings of the dress on the bag with hot glue. I then glued the top line of the apron onto the dress and tied a ribbon all the way around the bag then attached it at the top of the apron with a felt flower. To finish off the gift bag I printed this tag I found at Tom Kat Studio or another cute one at My May Sunshine and then hot glued it onto a wooden skewer and stuck it down in the bag.
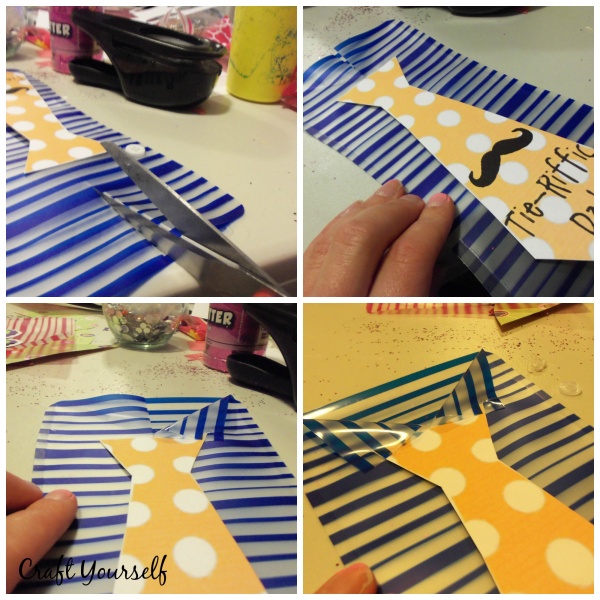
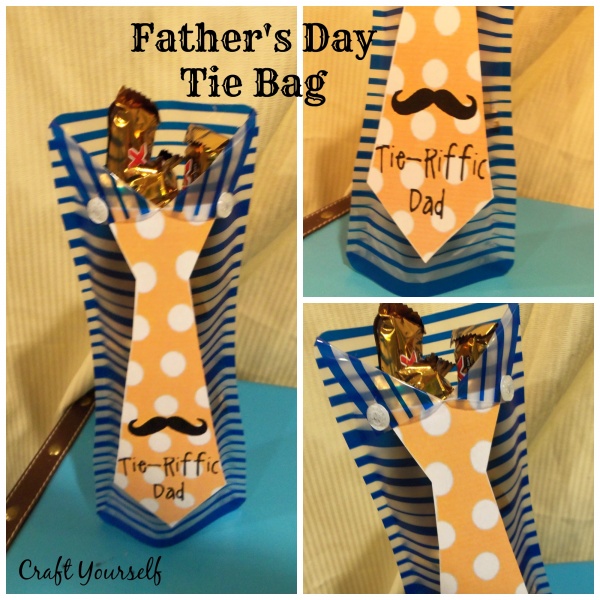
for my seventh idea. I copied this tie from Every Day Savvy and put it in word and then adjusted it to the size I wanted. I printed the tie, then cut about a 1 1/2 inch slit in the center top of the tall blue lined bag. I put a line of glue at the top of the tie and glued it at the bottom of the slit I cut. Next I folded over the flaps and put a dot of glue and glued the flaps onto the base of the bag. I attached 2 buttons onto the collar I created. I filled this bag with Twix treats!
18 Comments
Missi
These owl bags are the cutest things ever!! I can’t wait to make them with my girls!
Kim
I just love the talent that craftyourself.com shares with the world! Keep it up ladies!
tara pittman
These would make great teacher gifts. Oh how i had a crafty side to be able to make these.
Jamie
Those are all so adorable!! I’ll be having some on my blog post for #TBCCrafters this week, too! 🙂
Uplifting Families
These are adorable. I kinda miss my kids being in elementary school. I have a few years before my youngest goes off to school.
melisasource
All of these gifts are so awesome! I love the printables too!
Lynsey @MoscatoMom
Oh those bags are awesome!! I think the owls are my favorite. I cant see anything with an owl on it without thinking of Origami Owl though lol
Cindy @MomMaven
these are so cute! I’d love to give or receive all of them!
barbara langley
Love the owl bags. They are all nice though. I think the grandkids would enjoy making them.
Liz Mays
I can’t decide which version I love the most, but maybe the owl. They’re all so darn cute and creative though!
Valerie Remy-Milora
These bags are awesome! I love them all and am so inspired to try my hand at these. I love how much personality they have and how much they communicate to the person you are giving them to..
Ellen That Chic Mom
Wow so many cute ideas! I do love the owls though, my kids would get a kick out of those!
Crystal
Great ideas! The chalkboard hearts are so cute, but I also have a fascination with owls. I may have to try to make those.
Lisa from Life with Lisa
How did you come up with all these? I think they are adorable and I love the Easter bag! Thanks for sharing your printable with me.
Robin Gagnon
These are fantastic. I love the chalkboard look one & the Mother’s Day dress and apron bag is one I will have to make for my mom & MIL.
krystel
great posts these gifts look really good
Kimi
So cute. 🙂
Danielle
Thank you for the freebie tags…I’m not artistically gifted at all so this was very helpful and appreciated!