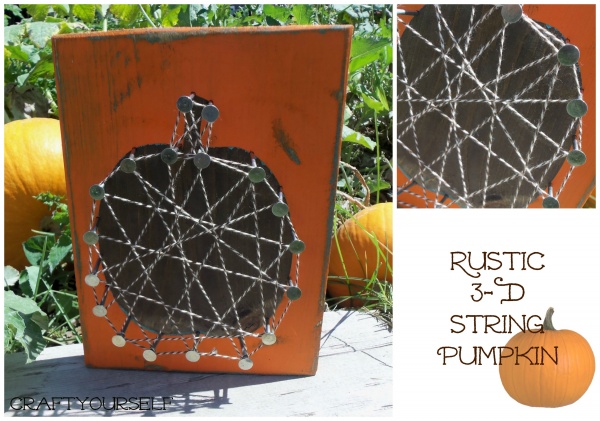
Rustic 3-D String Pumpkin
Finally! September is here and it is time to start thinking forward to fall. My pumpkins in my garden are turning a beautiful bright orange color, the sun is starting to set sooner and there is a hint of coolness starting into the evening air. Fall is one of my favorite times of the year with the colorful display of falling leaves, the smells of baked goodness and the start of sweater weather.
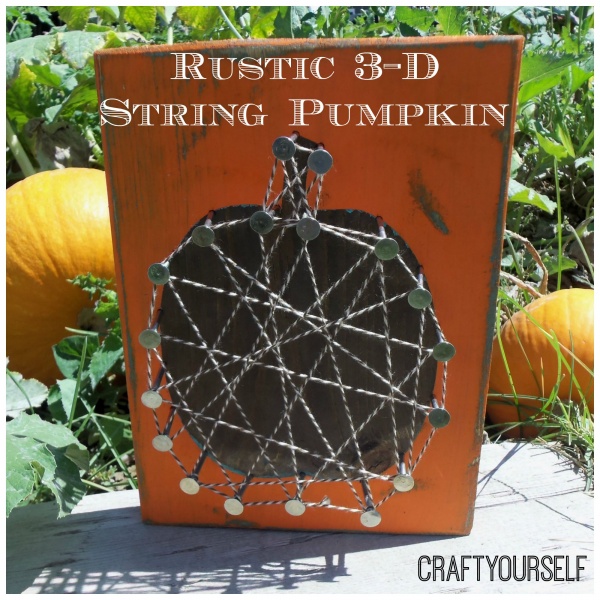
To get a jump start on Fall decor’ we have so many fun items in our Fall line up of crafts. Beginning with this cute wooden block pumpkin.
First take a block of wood (our’s measured 10″ x 7″) I mixed up some of my famous wood glaze, I painted the board with the wood glaze and while it was drying I cut a pumpkin shape on contact paper using my personal cutting machine. After the glaze was dry I applied the pumpkin contact paper to the center of the board then I painted the entire board orange. While the paint was drying I went ahead and removed the pumpkin shaped contact paper. I find that removing the stencil while the paint is still wet seems to give the edges a cleaner line. After the paint was completely dry I sanded the edges and a few spots on top to give it a rustic look. I gathered a box of nails and began pounding nails around the edge of the pumpkin design. I ended up using 18 nails placing them approx. an inch apart. Last I used bakers twine and tied it around the nails starting with the outline first. Then I crossed the twine back and forth until it looked even and filled in.