
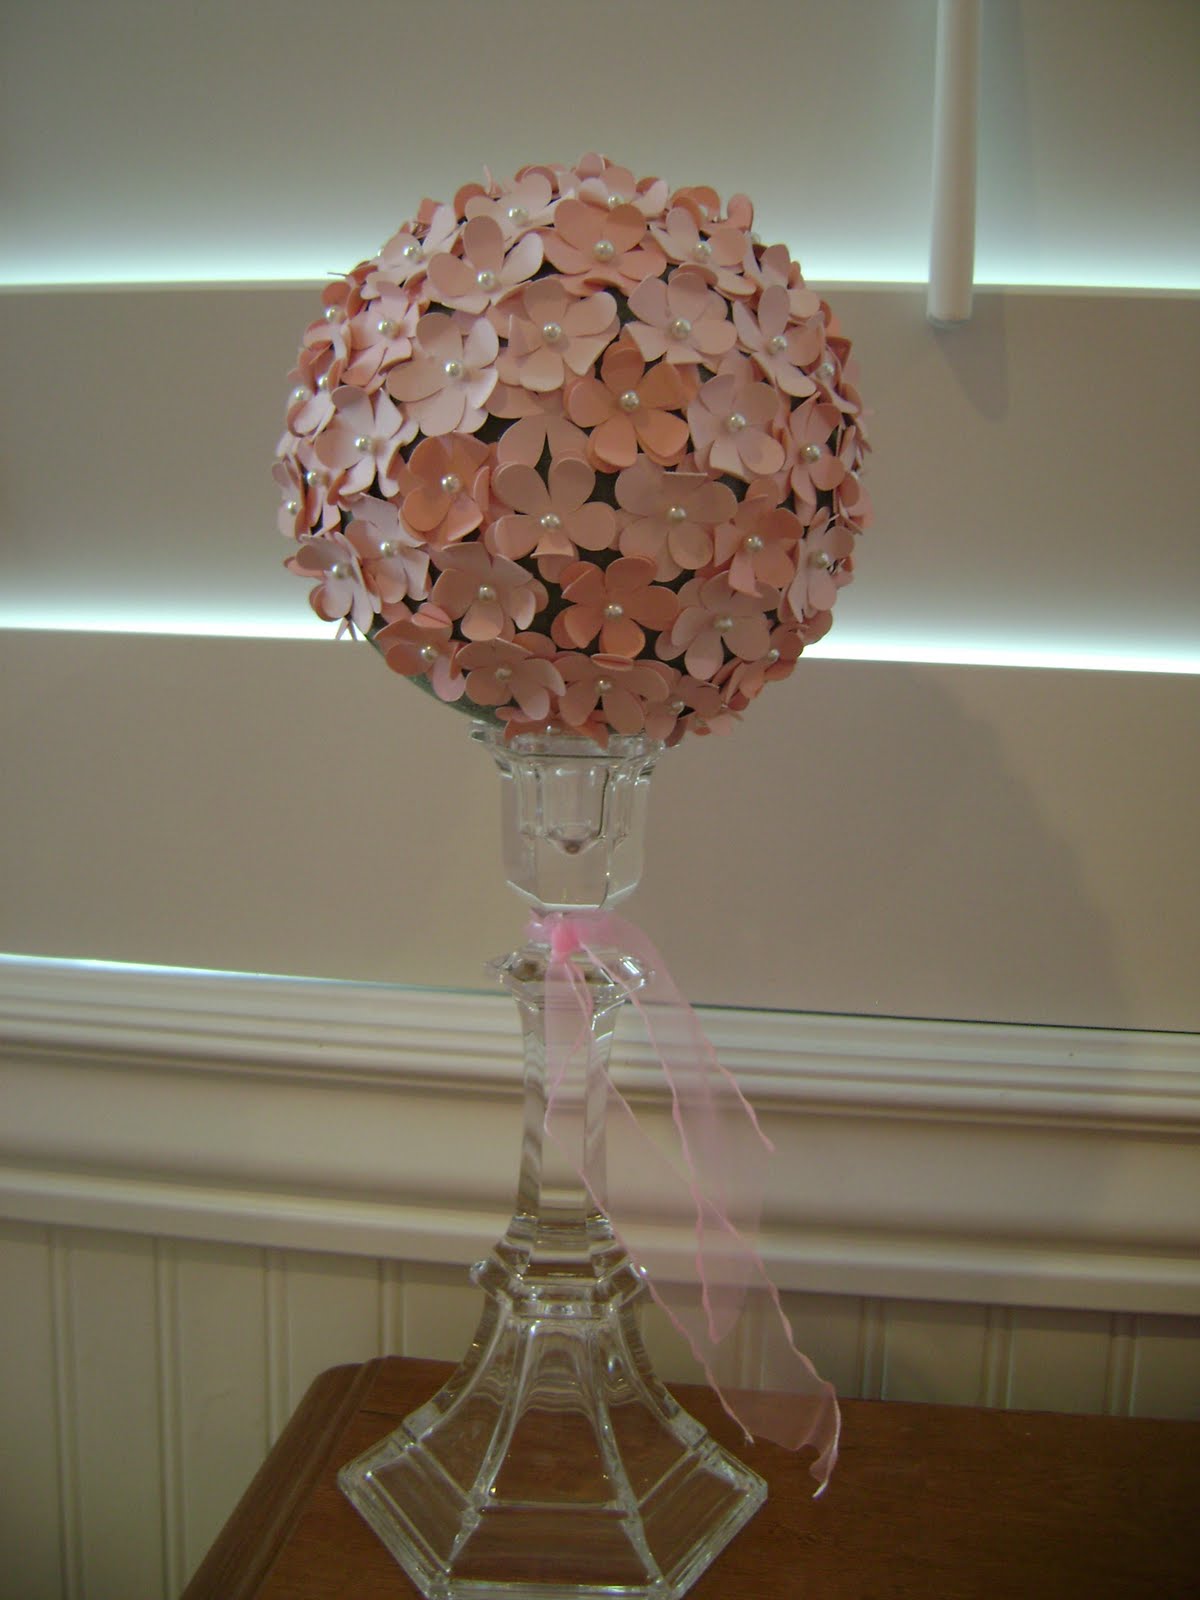
Making a Pomander Ball
I have learned crafting is fairly easy just having the patience to see it come together and having the resources/supplies to create something.
I found these Pomander Balls online at Pizzazzerie
I love tutorials but I find myself always doing them just a bit different than the person who’s tutorial I am following. In Courtney’s tutorial she used her paper punch and I thought that would be exhausting cutting out each individual flower so instead I used a piece of card stock and my cricut. 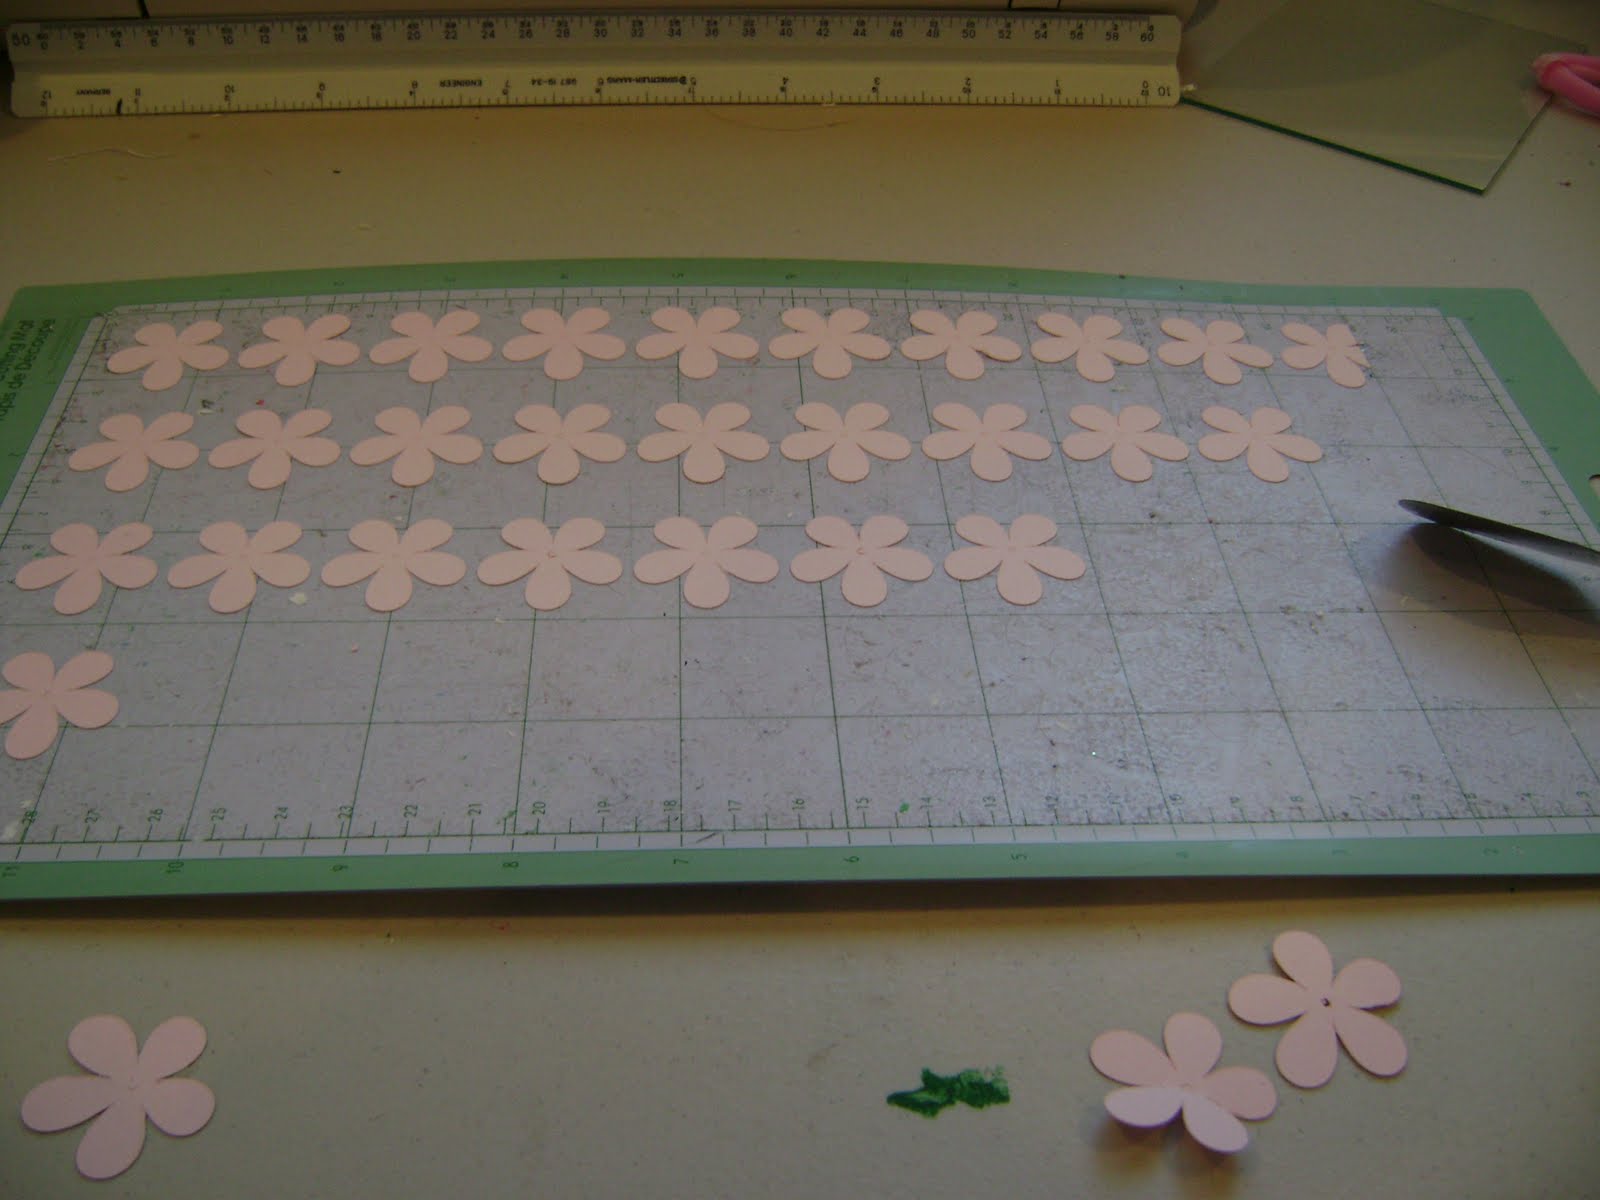
Maeli is the only child that I can keep her attention in the crafting department and really has a desire to learn about the things I am making so while I worked on something else I told her if she did this then she could have it in her room when it was done.
At the time I didn’t have any styrafoam balls in my house so I used what I had which was one of those green balls you find in the floral department. I did not like using it as it left gritty green stuff on your hands BUT I already had it at home and didn’t want to run to the store to buy one. 
She went to work on it. I showed her what to do and it is easy enough for a child to do! The ball I had was much bigger than the one Courtney used in the tutorial so about half way through Maeli got burned out so I finished it up.

Didn’t it turn out so cute? I would love to make a few more it is just finding the time! 

5 Comments
Michele
ADORABLE!!!
Megan
Love it!
Which cricut image or cartridge did you use?
J.
I like that you improvised and used what you had. It looks like Maeli had fun with this project as well! Cute Pomador Ball!
Avry and Justin
Megan it was the George and Basic shapes V1 cartridge and there is the option of two flowers on there. I used one of them.
Elizabeth
Saw your post over on Pizzazzerie (I made some of my own too). I love how yours turned out and that's genius to use the cricut. I cut them by hand and it took me about 1 hour per ball. Eek! Love yours! 🙂